- Home
- Blog
DIY Cluster Lashes Guide: A Safe & Beginner-Friendly Step-by-Step Tutorial
Cluster lashes are one of the easiest ways to achieve fuller, lifted lashes at home—without scheduling a salon appointment. Loved by beginners and beauty enthusiasts alike, they offer a soft, customizable finish that sits comfortably for 1–3 days.
This complete guide shows you how to safely apply DIY cluster lashes, choose the right styles for your eye shape, avoid common mistakes, and remove them without damaging your natural lashes. All tips have been reviewed by professional lash trainers and follow safety recommendations from reputable eye-health organizations.
Home Application
False Eyelash Knowledge Hub
1. What Are DIY Cluster Lashes?
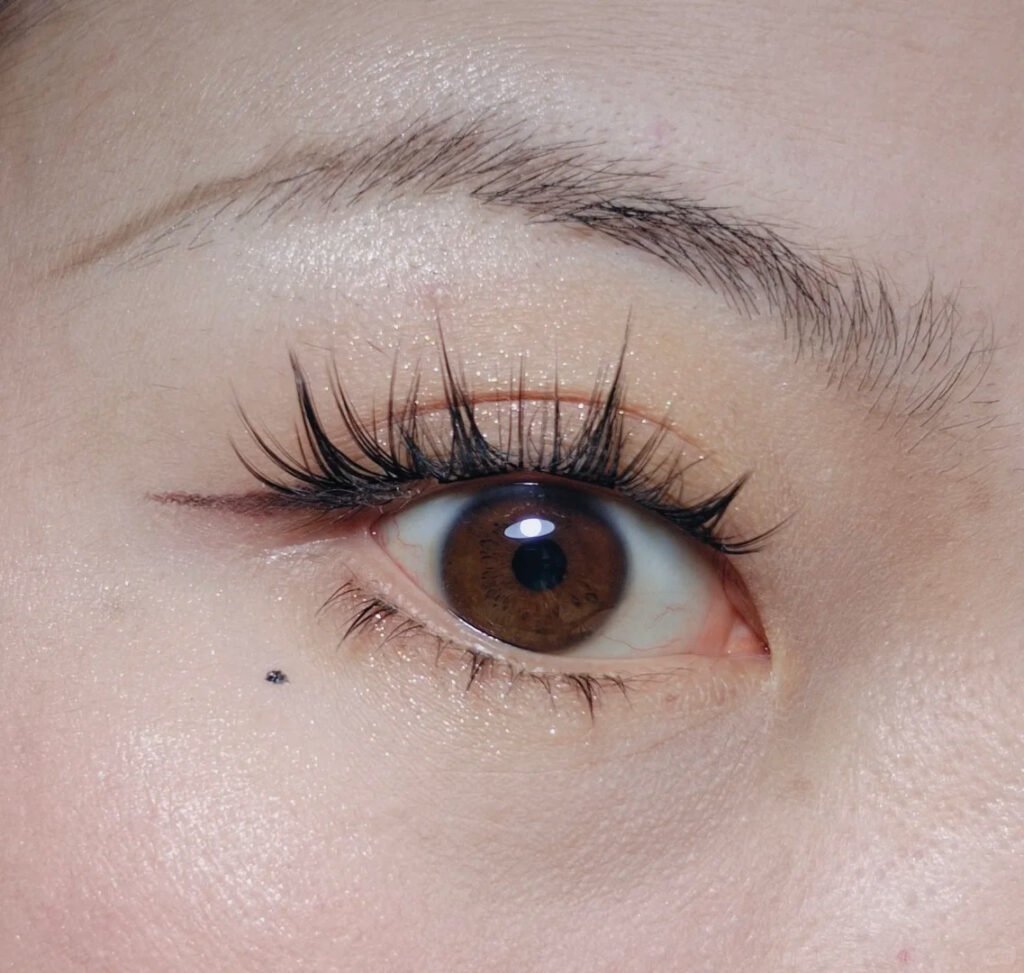
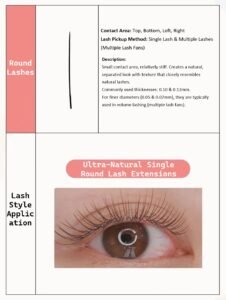
Cluster lashes are small lash segments (typically containing 2–5 fans) that attach beneath your natural lashes.
Compared with strip lashes, they offer:
A more natural, seamless appearance
Flexible customization
Lightweight comfort for daily wear
A shorter learning curve for beginners
2. Tools You’ll Need (Beginner Kit)
For a smooth first experience, prepare the following:
Cluster lashes (8–14 mm recommended for beginners)
Bond/adhesive designed for cluster lashes
Sealant to remove tackiness
Precision applicator or tweezers
Oil-free lash cleanser
Oil-based remover
Tip: For beginners, choosing lightweight clusters with a heat-bonded base is key. This manufacturing process fuses the lash fibers to the base without excess glue, which helps reduce stickiness during application and improves retention.
For readers with sensitive eyes, our guide on how to choose lash adhesive for sensitive eyes can help.
3. Step-by-Step Tutorial: How to Apply DIY Cluster Lashes Safely
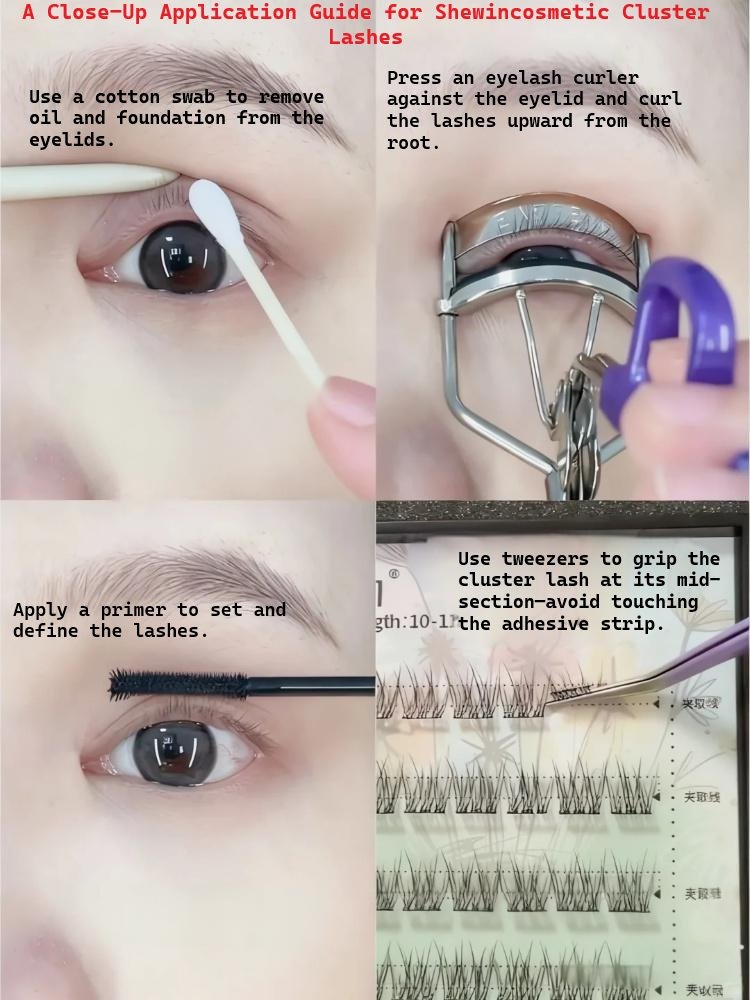
Step 1: Clean Your Natural Lashes Thoroughly
Use an oil-free cleanser to remove sebum, mascara, and residue.
Why it matters: Oils are one of the main reasons adhesives fail.
Step 2: Choose Your Cluster Lengths
A simple, beginner-friendly lash map:
Inner corner: 10 mm
Middle: 12 mm
Outer: 12–14 mm
Shorter clusters are easier to maneuver and look more natural.
Step 3: Apply a Thin Layer of Bond
Brush a minimal amount onto the base of your natural lashes.
Avoid coating the entire lash—this causes clumping and discomfort.
Safety Note: Eye-health organizations such as the American Academy of Ophthalmology warn that adhesives should never touch eyelid skin to prevent irritation.
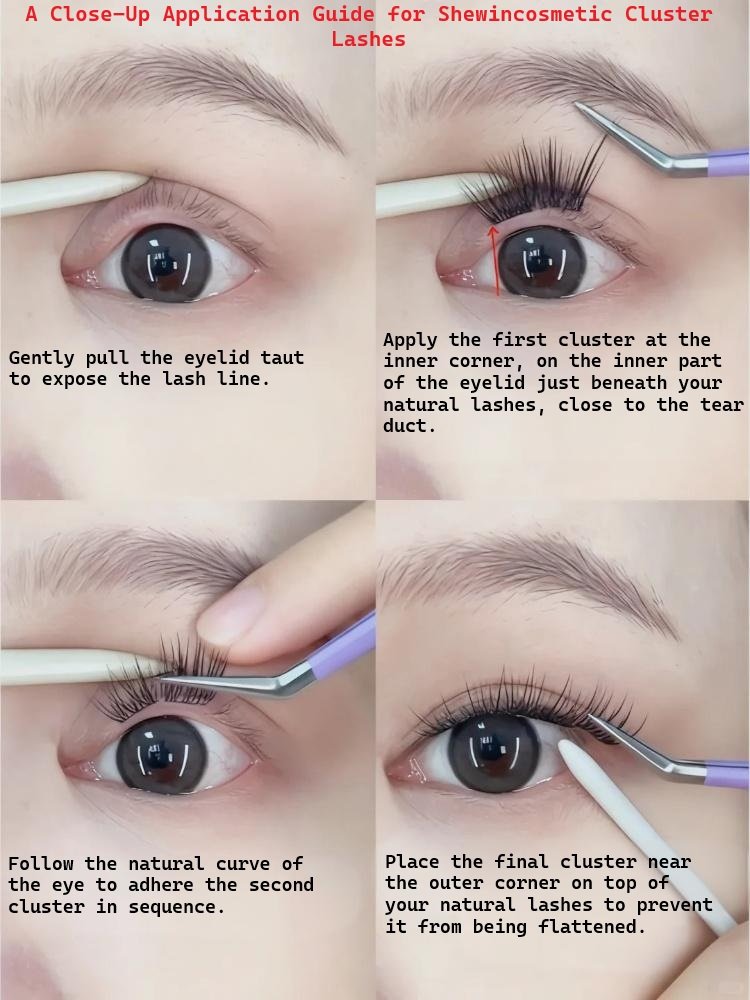
Step 4: Place Clusters Underneath the Natural Lash Line
Using your applicator:
Look slightly downward
Place each segment just above the waterline, without touching the skin
Leave small gaps between clusters for flexibility
This underside method creates a clean, extension-like look.
Step 5: Gently Fuse the Clusters
Pinch the cluster and your natural lashes together for 2–3 seconds.
Use soft, even pressure—no squeezing too hard.
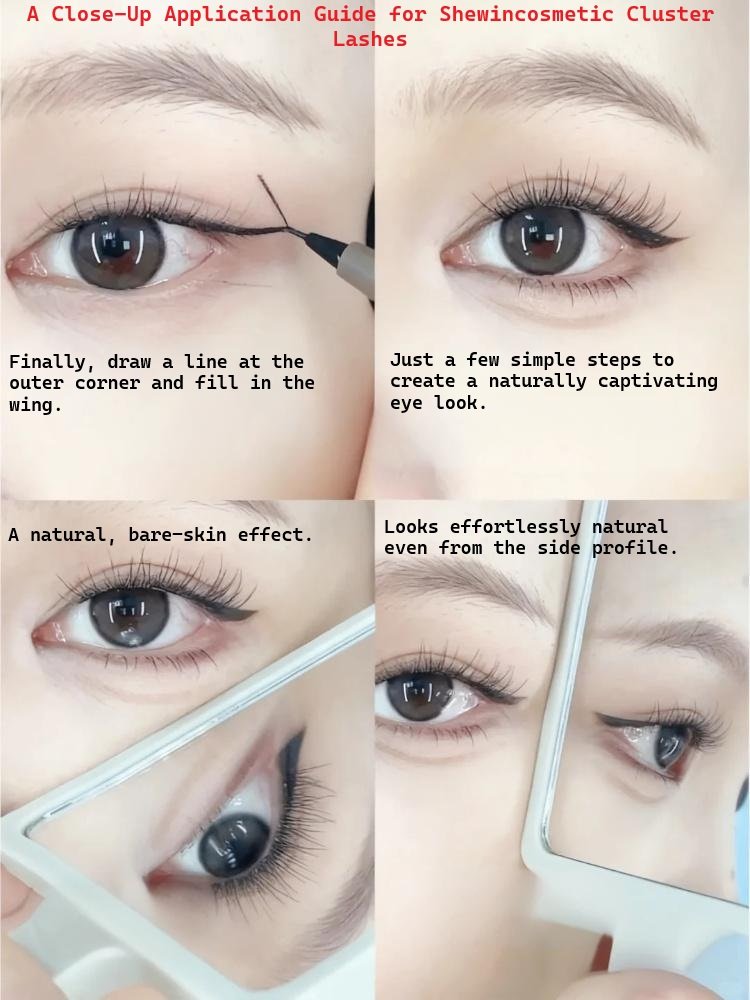
Step 6: Seal the Base
Apply a small amount of sealant only where you see adhesive.
This reduces tackiness and improves wear time.
4. DIY Cluster Lash Mapping Examples for Beginners
Soft Daytime Look (Most Beginner-Friendly)
10 mm – 12 mm – 10 mm
→ Natural, lifted appearance.
Cat-Eye Look
10 mm – 12 mm – 14 mm
→ Ideal for almond eyes or a lifted outer corner.
Dolly Eye Look
12 mm – 14 mm – 12 mm
→ Opens the eyes for a good, rounded effect.
Wispy/Textured Look
Mix 8–14 mm
→ Soft, fluttery, social-media style texture.
5. Choosing the Right DIY Cluster Lashes: A Universal Buying Guide
Below is a fully neutral, brand-free selection guide for all users.
It teaches readers how to judge quality—not what to buy.
Feather-Light Clusters
Best For: First-time users, natural daytime looks
Key Features:
Fiber weight is typically below 0.05 g per segment
Soft, flexible band/stem
Smooth curl with minimal stiffness
Effect: Blends naturally with your own lashes for a seamless finish.
Wispy Flare Clusters
Best For: Textured, layered, or “wispy lash” looks
Key Features:
Multi-layered fibers
Alternating lengths for movement
Semi-matte finish for natural definition
Effect: Creates a fluttery, dimensional lash line.
Seamless-Band Glam Clusters
Best For: Night-out looks or dramatic glam styles
Key Features:
Ultra-thin, almost invisible band
Dense fiber distribution
Stronger curl retention for humidity
Effect: Bold, glamorous appearance while maintaining comfort.
Short-Stem Clusters
Best For: Users seeking the most natural base
Key Features:
Shorter roots that blend into natural lash line
Reduced band visibility
Lightweight for sensitive eyes
Effect: A clean, “no-band” finish ideal for minimal makeup lovers.
6. Safety Tips (Highly Recommended for All DIY Users)
These safety principles align with widely recognized eye-care guidelines:
Always patch-test adhesive 24 hours before use
Never apply clusters directly to the skin
Choose lightweight fibers (0.03–0.07 mm) to reduce strain
Sleep on a soft pillow and avoid face-down positions
Always remove clusters with oil-based remover, never by pulling
Clean your tools before each use
Stop immediately if you feel burning or persistent irritation
Understanding Material Safety: Did you know that the materials used in your lash clusters can significantly impact both safety and comfort? For a complete breakdown of what goes into quality lash products—from fiber types to adhesive ingredients—read our detailed guide: What Are Lash Extensions Made Of? A Comprehensive Guide to Materials, Safety & Trends
7. Troubleshooting: Fixing Common Beginner Problems
Problem: “My clusters fall off quickly.”
Clean lashes thoroughly
Reduce oil-based makeup
Use a thinner layer of bond
Problem: “The bond stays sticky.”
Apply less adhesive
Add a small amount of sealant
Allow the bond to set for 1–2 minutes
Problem: “Clusters look uneven.”
Follow a lash map
Overlap segments slightly
Start from the outer corner for better symmetry
Problem: “Glue touches my eyelid.”
Keep bond at the lash base only
Avoid pushing clusters too high
Problem: “My eyes feel irritated.”
Switch to a sensitive-formula adhesive
Avoid latex or common irritants
Remove immediately if symptoms persist
8. How to Remove DIY Cluster Lashes Safely
Coat the lashes generously with oil-based remover
Let it sit for 20–30 seconds
Gently slide clusters off without pulling
Clean your natural lashes with an oil-free cleanser
Allow lashes to rest before reapplication
Frequently Asked Questions
1. Are DIY cluster lashes safe for beginners?
Yes, cluster lashes are considered beginner-friendly when applied correctly. The key safety rules are: always apply them beneath the natural lash line, ensure the adhesive never touches the skin, choose lightweight clusters to reduce strain, and perform a patch test with the adhesive 24 hours before use.
2. How long do DIY cluster lashes typically last?
With proper application and care, most DIY cluster lashes last between 1 to 3 days. For the longest wear, look for clusters with heat-bonded bases, which we detail in our buying guide above. Factors affecting longevity include adhesive quality, lash preparation, and avoiding oil-based makeup products.
3. What is the best cluster lash length for first-time users?
For first-time users, we recommend starting with shorter clusters between 8mm and 12mm. These lengths are easier to handle, provide a more natural and mistake-forgiving look, and are more comfortable to wear as you get used to the feeling.
4. Why are my cluster lashes falling off quickly?
If your clusters are falling off prematurely, the most common causes are: insufficient cleaning (oil breaks down adhesive), using too much or too little bond, or placing the clusters on the skin instead of the lash line. Be sure to follow our step-by-step cleaning tutorial in the guide above for the best results.
5. Can I be allergic to cluster lash adhesive?
Yes, some individuals may be sensitive to ingredients like latex or cyanoacrylate in lash adhesives. This is why a patch test behind the ear or on the inner arm 24 hours before use is crucial. If you experience redness, itching, or swelling, remove the lashes immediately and consult a dermatologist.
6. How do I remove cluster lashes without damaging my natural lashes?
To remove cluster lashes safely, soak a cotton pad with an oil-based remover, hold it against your lash line for 20-30 seconds to dissolve the adhesive, then gently slide the clusters sideways. Never pull or tug. Finish by cleansing your natural lashes with an oil-free cleanser.
Author Information
Written by:
Lena M., Senior Lash Trainer & Beauty Educator (7+ years experience)
Specializes in consumer lash education, lash safety training, and beginner-friendly techniques.
Conclusion
DIY cluster lashes make it easy to recreate salon-quality results at home.
With safe application, proper mapping, and smart selection of cluster-lash styles, beginners can enjoy natural, wispy, or glam looks that last up to several days.
Focus on safety first, follow the steps carefully, and choose clusters with lightweight fibers, flexible stems, and a heat-bonded base for the best beginner experience.
Shewincosmetics is a professional false eyelash manufacturer dedicated to sustainable beauty solutions. With more than 10 years of experience and 1000+ customizable designs. Redefine the beauty industry with a partner committed to excellence.
3177 Guhe Street, Ligezhuang Town. Qingdao
bella@shewincosmetic.com
+86 15192708101

Professional eyelash manufacturer. We produce thousands of eyelash products with mink hair, horse hair, synthetic, and other materials. There is always one suitable for your business with factory wholesale prices.
Copyright © 2025 Shewincosmetic